IMPORTANT NOTE: Pipe diameter and length shown for example purposes only. Actual diameter and length need to be proportioned to size of weir and the outflow pipe through the levee.
IMPORTANT NOTE: Pipe diameter and length shown for example purposes only. Actual diameter and length need to be proportioned to size of weir and the outflow pipe through the levee.
These simple structures can be made by a fabricator or hobbyist welder. Installation takes 1-2 hours and is easiest under dry conditions.
Materials list:
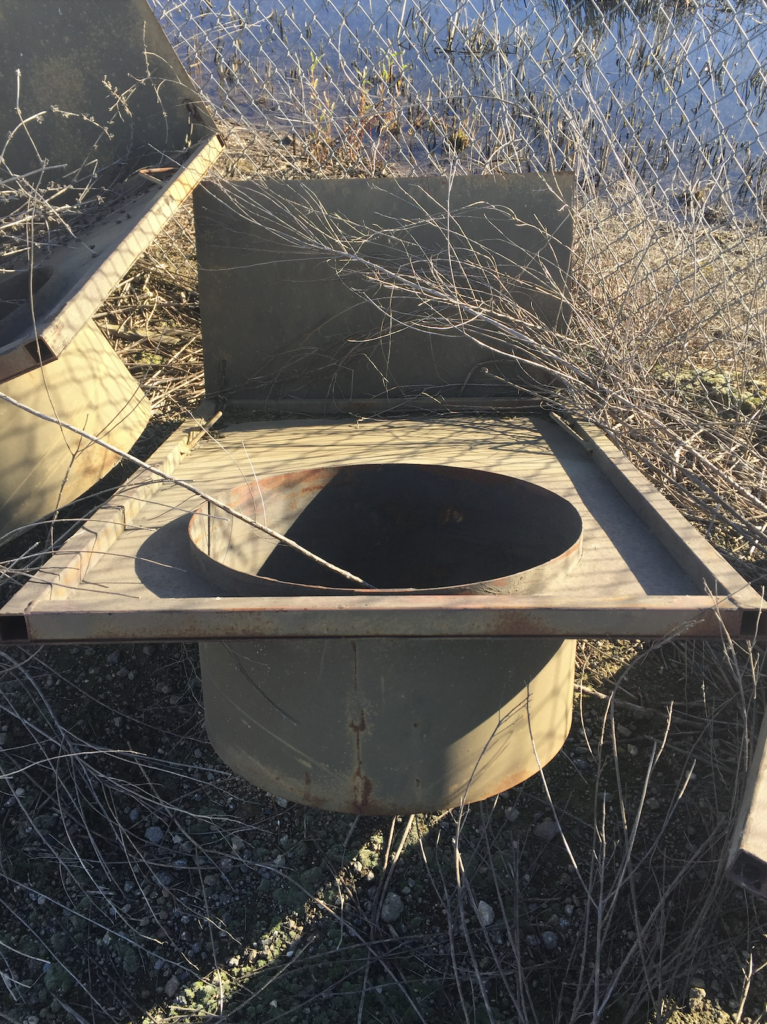
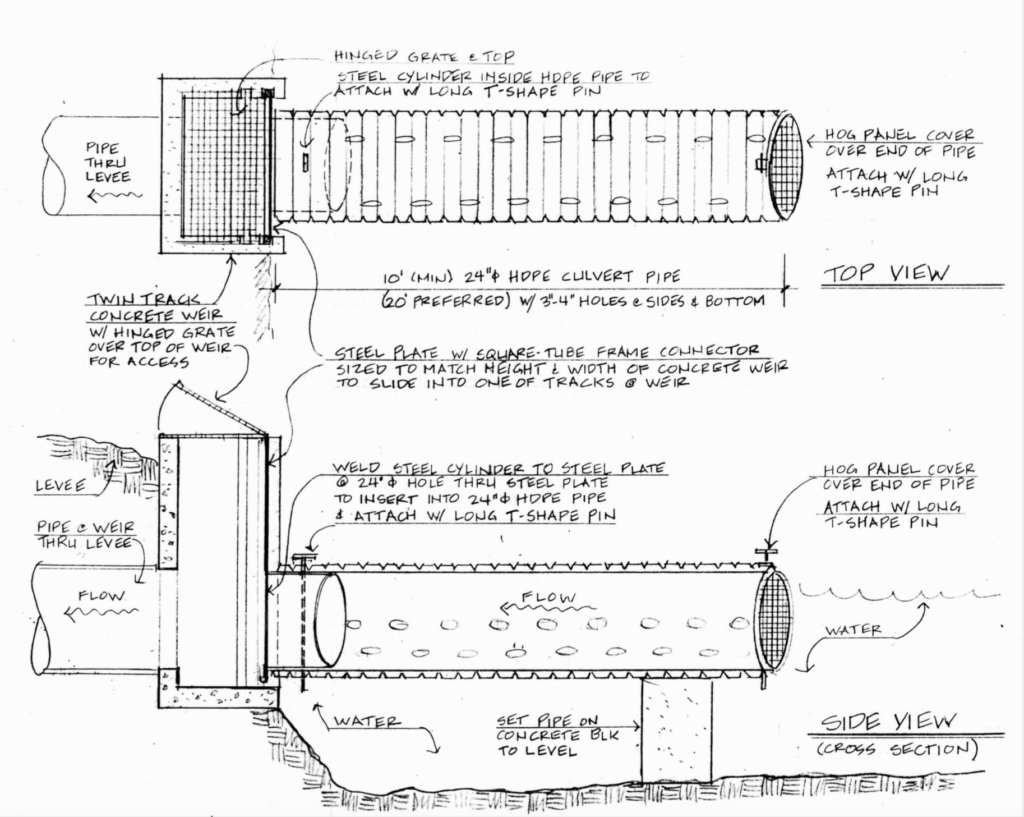
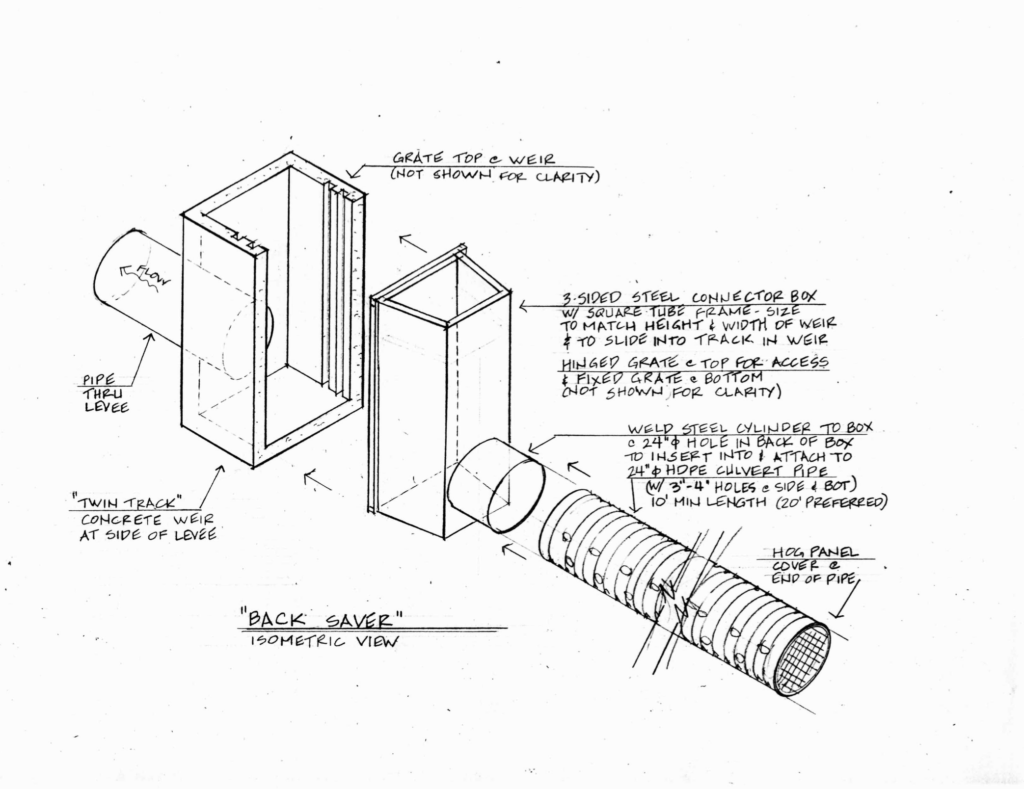
- Custom-fabricated single- (prototype 1) or three-sided (prototype 2) connector box sized to fit the weir you are protecting. Steel cylinder should match inside diameter of the HDPE pipe chosen to match the outflow pipe through the levee.
- 10 to 20-foot long HDPE culvert pipe (diameter of pipe is sized proportionally to size of weir and the outflow pipe through the levee) with holes for rebar pins on both ends; pipe should be perforated 4 rows of 4-inch-wide holes with 1-foot spacing between them, making sure one of these rows is on the bottom of the pipe.
- Custom rebar pin to secure pipe to steel cylinder on front of box
- Concrete block with an attachment point on top or a custom-fabricated metal support for pipe
- Galvanized chain to secure pipe to support (8′ works for a 24″ pipe)
- Hardware to close the chain (nuts, bolts, lube)
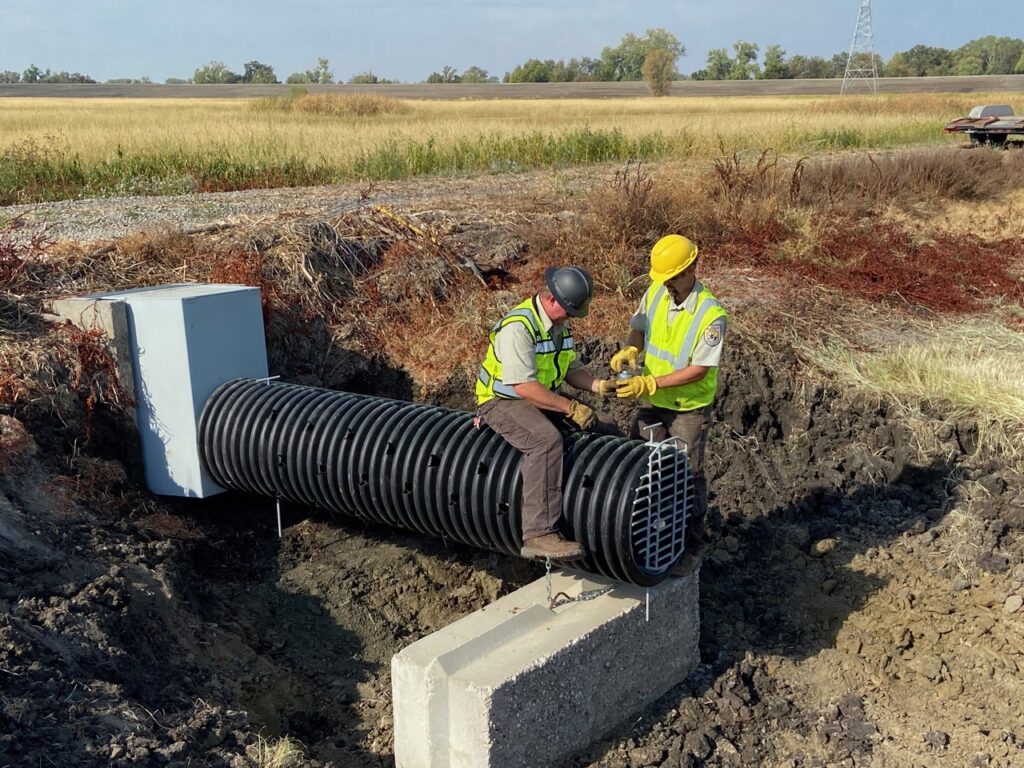
- Hog paneling or custom-made grate sized to cover pipe inlet
- If connector box lid does not cover weir itself, you will need to build another grate to cover the top of the weir
Tools for installation:
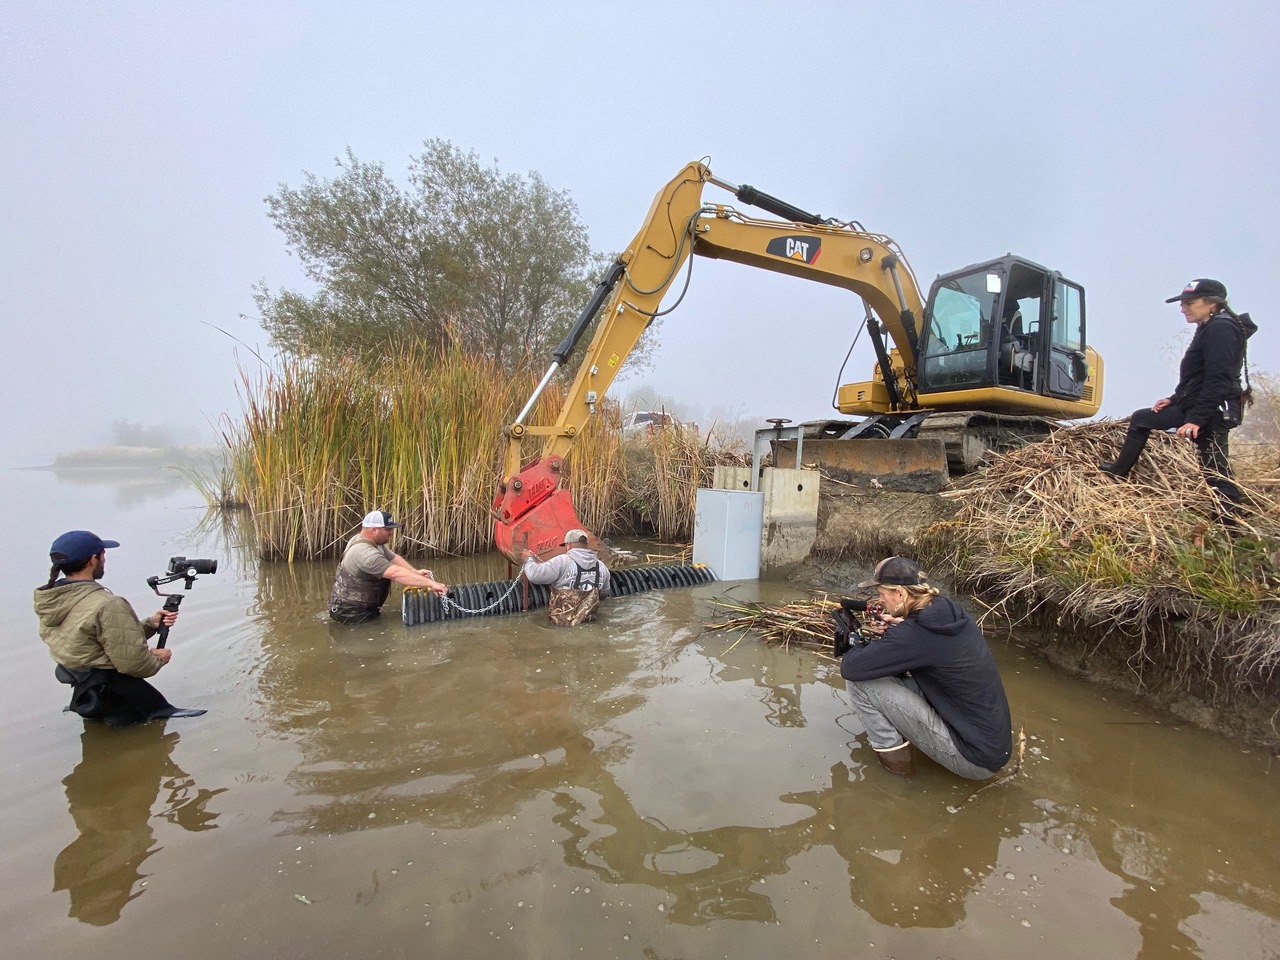
- For dry installations, a backhoe; for wet installations, an excavator
- Laser level (or other means to level concrete block with weir)
- Rope or chain to secure device to backhoe or excavator bucket
Instructions:
- Clean the twin track weir of any debris.
- Dig out a hole or basin to accommodate structure keeping in mind that you will need enough space for the concrete block that supports the pipe.
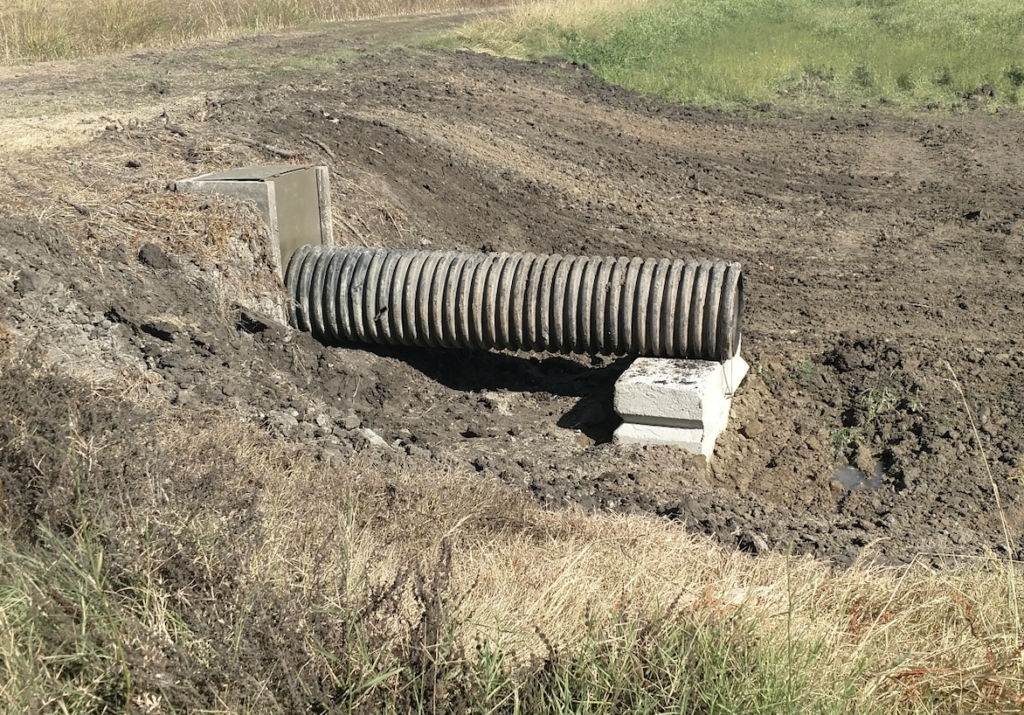
- Place a concrete block with the top resting at the same elevation as the bottom of the weir.
- Slide the one- or three-sided connector box through the outer track of the twin track weir.
- Fit the perforated pipe onto the one- or three-sided steel connector box, making sure one row of holes is at the bottom, and pin it to stay secure.
- Chain the pipe onto the concrete blots blocks so the pipe couldn’t float away or move.
- Add the hog paneling or custom grate to pipe inlet to keep beavers from coming in.